![How to Install Bilge Pump on a Jet Ski [Video]](https://www.jetdrift.com/wp-content/uploads/2021/10/how-to-install-bilge-pump-on-a-jet-ski12.jpg)
How to Install Bilge Pump on a Jet Ski [Video]
You can install a bilge pump on your jet ski in six simple steps:
- Invest in a high-quality jet ski bilge pump kit
- Drill an outlet hole and install the hull fitting
- Install the wiring and the switch
- Mount the pump
- Install the water outlet hose
- Test the system
We at JetDrift have compiled all you need to know into this step-by-step guide!
How to Install Bilge Pump on a Jet Ski
1. Invest in a Jet Ski Bilge Pump Kit
When it comes to purchasing a jet ski bilge pump kit, it’s essential that you invest in a high-quality pump with adequate capacity.
As a rule of thumb, the pump should have a rating of at least 1000 gallons per hour.
Don’t waste your money on a cheap and unreliable pump! If your jet ski starts to sink due to hull damage or a broken carbon seal, you will need decent pump capacity.
Unfortunately, factory jet ski bilge pumps are usually rated at 500 GPH or less, if available at all. In many cases, this capacity is not sufficient; this is why you should stick with a heavy-duty aftermarket jet ski bilge pump with larger capacity.
You may be wondering what you should buy, an automatic or manual unit?
Many riders say that an automatic jet ski bilge pump is the only way to go. You can wire it directly to the battery, and you no longer have to pay any attention to it.
Automatic bilge pumps are typically equipped with a “flat switch” that automatically starts when it detects water in the bilge. It’s safe and convenient as the pump turns on/off itself, depending on the presence of water.
Drawbacks?
In case of a switch failure, the pump can burn out or even drain the battery.
This is why other riders only trust manual jet ski bilge pumps. These pumps can be controlled by a simple two-way switch mounted in the glove box or under the seat.
However, this system has its downside as there is always a danger that you won’t notice water starting to accumulate in the bilge.
To get the best of both worlds, you can find special automatic bilge pumps that come with a three-way override switch.
As the name suggests, this type of switch is intended to override the float switch, allowing you to choose from three options: On/Off/Automatic. You can leave this switch on Auto during your rides and Off while the ski is out of the water.
It’s also wise to invest in a waterproof jet ski bilge pump switch to avoid corrosion issues.
Another common solution is installing two bilge pumps in the hull, an automatic and a manual one.
2. Drill the Outlet Hole
There’s no question that the scariest step in this process is that you have to drill a bigger hole into the body of the jet ski.
Yes, you read correctly; there is no other way than grabbing an electric drill to make a hole for the bilge outlet. Don’t try to connect the pump to the tell tale hose or use a fitting’s hole as an outlet, as they would restrict water flow, making the pump useless.
Where do you make this hole for the outlet?
As a rule of thumb, the hole should be above the waterline. Never install the outlet below the waterline as a broken hose or a loose outlet can cause your jet ski to sink. Best practice is to mount the outlet fitting into the top deck of the jet ski.
The exact location of this outlet depends on personal preferences.
Many riders prefer to place it in a visible spot near their knees or near the registration number on the front. Although the outlet is more recognizable in these places, you can easily notice if the pump is working.
If water is entering the hull, it’s better to know about it sooner rather than later!
Others prefer to mount the outlet on the rear side of the top deck. Some of the most popular spots are the tow hook area and below the passenger handrails.
As an example, here are some ideas for the most common spots: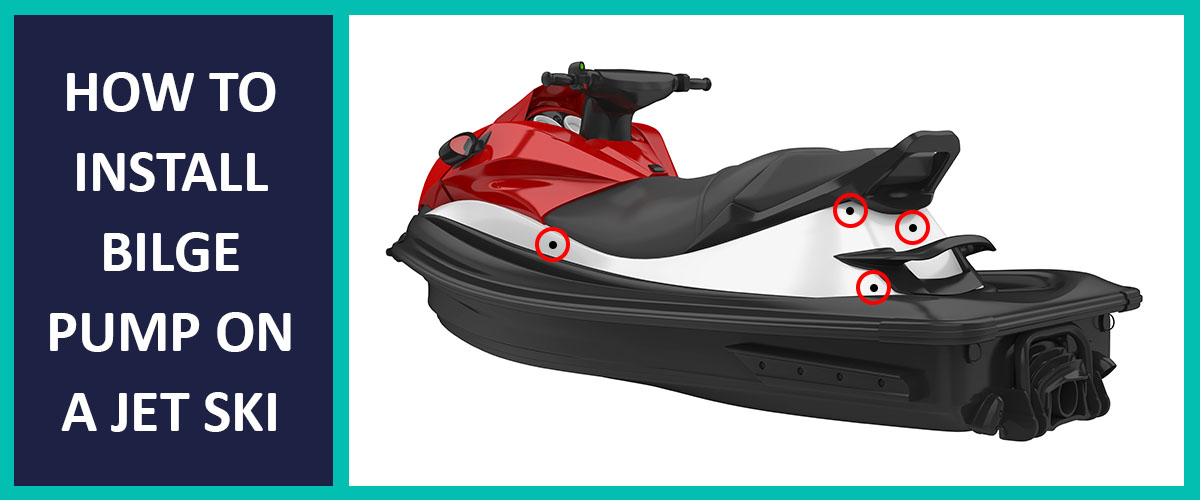 It also makes sense to mount the outlet as close to the pump as possible, as a long discharge hose would restrict the pump, resulting in a slower flow rate.
Also, you may want to make sure that the nut lays flat on the inside of the hull where you want to drill the hole.
As they say, measure twice, cut once!
Once you’ve found the perfect spot, tape the back and front sides of the deck with masking tape. This can save the surface from chipping when you cut the hole.
You can cut the hole with a bi-metal hole saw that matches the size of the outlet fitting.
Another trick is to start drilling in reverse to avoid chipping the gel coat. Once the saw goes through the gel coat, you can switch the drill forward. Also, make sure that you take your time and drill slowly.
When it’s done, smooth the edge of the hole with fine sandpaper. Remove the tape and clean the surface. Apply some silicone on the outlet fitting and mount it into the hole.
You can see the entire process of how to cut a hole in a jet ski hull in this video:
3. Install the Wiring and the Switch
Next, you have to install the wiring and the switch. If you have an automatic bilge pump, you have to connect it directly to the battery.
But if you have a manual pump or an automatic pump with a three-way switch, you need to find a place for the switch.
The bilge pump switch on a jet ski can be placed under the seat or in the glovebox. Let’s consider the pros and cons of each solution.
Having the switch in the glove box provides easy access, so you can quickly control the pump, even in emergencies.
On the other hand, there’s always a risk that something could hit the switch in the glove box, resulting in a burnt pump or a drained battery.
Because of these risks, you may want to mount the switch under the seat. You can use a little aluminum bracket as a holder.
With this configuration, you can keep the bilge pump Off while the ski sits on the trailer and set it to Automatic before the rides.
The removal of the seat is mandatory anyway as it’s part of the pre-ride inspection. It also ventilates the engine bay, which helps avoid accidental explosions.The major drawback of this setup is that you can’t control the pump without removing the seat. This means that if the pump doesn’t turn on automatically for some reason, you have to remove the seat to set it to a Manual position.
Let’s face it; this can be quite tricky on rough waters, especially in an emergency!
When it comes to jet ski bilge pump wiring, make sure that you follow the installation instructions by the pump’s manufacturer.
Don’t forget to seal the connections and secure the wires with zip ties to hoses or fittings.
4. Mount the Pump
Next, you have to mount the pump in the bilge. Before installation, it’s a good idea to test it in a bucket of water.
It’s recommended that you attach the bilge pump bracket firmly to the hull to keep the pump from bouncing around.
Best practice is to use a special glue (e.g., Permatex ‘The Right Stuff’ Black Gasket Sealant) for this purpose. Just held the bracket in position until the glue is cured.
General wisdom says that the pump should be placed at the rear of the engine bay, in the lowest part of the hull. This is because water generally starts to accumulate in the rear portion of the hull.
You can’t go wrong by mounting the pump to the side of the jet intake, or just next to it to the bottom. (The sweet spot depends on the design of the pump and the shape of the bilge.)
However, if you have a Sea-Doo, you should place the pump directly next to the carbon seal for safety reasons.
This installation can be tricky as some parts like the exhaust, hoses, or some floatation foam may need to be removed to provide access.
5. Install the Hose
Once the pump is in place, it’s time to connect the hull outlet fitting and the pump.
To minimize flow loss, use a smooth wall hose as the water exit hose. When installing it, make sure that it has no tight bends or kinks.
Also, the hose shouldn’t be routed near high heat like exhaust resonators.
For the best performance, connect the outlet fitting and the pump directly without any elbows or other fittings.
But if you have to use an elbow for some reason (e.g., to keep the hose away from heated areas), make sure that it doesn’t significantly restrict water flow. There are special, 90-degree hull outlet fittings designed for fishing live wells that don’t narrow down the cross-section, so they are not very restrictive.
6. Test
As the last step, make sure that the pump works properly. Just pour some water with a garden hose into the bilge to test the pump. Don’t run the pump dry to avoid damage.
It’s also good to know that many pumps need 10-20 hours of ‘break-in period’ before achieving their full capacity.
Takeaway
Installing a jet ski bilge pump is not rocket science, so it can even be done in your garage.In a nutshell, the most common jet ski bilge pump configurations are as follows:Pump type:
- Manual jet ski bilge pump with a two-way switch
- Automatic jet ski bilge pump with direct wiring
- Automatic jet ski bilge pump with override switch (recommended)
- The pump should have a rating of at least 1000 GPH
- No switch – Direct wiring
- Two-way switch (for manual pumps)
- Three-way override switch (On/Off/Auto) – recommended
- In the glove box
- Under the seat, in the engine bay
- The deepest part of the bilge, around the jet intake
- On Sea-Doos: close to the carbon seal
- Never mount the pump in the front of the hull
- Never below the waterline
- Close to the pump if possible
- Most common: under the passenger handrail/tow hook area
If you are looking for greater security, you may want to install two bilge pumps, an automatic, and a manual for emergencies!


